SSH for Windows
Overview
This document details how to install and configure Secure Shell (SSH) on your Windows-based PC system.
The SSH client facilitates safe and secure
- login to remote computers;
- file transfer to/from remote computers;
- command execution on remote computers;
- encrypted and authenticated communication between your PC and remote computers.
SSH replaces unsecured terminal-to-server communication applications, such as Telnet and FTP.
We recommend customers who install SSH also review the SSH help documentation included within the SSH product for additional information regarding use of this program.
System Requirements
To install the SSH client your computer must
- be capable of running a current version of the Microsoft Windows operating system [Windows 95 (OSR2.1), Windows 98 or 98 SE, Windows ME, Windows NT 4 (with Service Pack 5 or 6 installed), Windows 2000 (with Service Pack 1 or 2 installed), or Windows XP];
- be equipped with a functional connection to a remote host computer;
- have 4 megabytes of free disk space.
Note that once installed, SSH saves each user's SSH settings in her personal directory.
Preparing to Install SSH Secure Shell
P.1. Under Windows NT, 2000, or XP, you need to have “Administrator”
permissions to your computer’s operating system to install this program. If you
are unsure you have the required permissions, check with your Computer Support
Coordinator (CSC) or the individual who provides your desktop support.
P.2. Go to: Secure Shell Licensing Information.
P.3. Click on the ‘SSH 3.2.9 for Windows95/98/2000/NT/ME’ link.
P.4. Save SSHSecureShellClient-3.2.9.exe to your desktop.
Installing SSH Secure Shell
I.1. Double-click the SSHSecureShellClient-3.2.9.exe.

SSH Secure Shell Client displays the “Welcome to SSH Setup” screen.
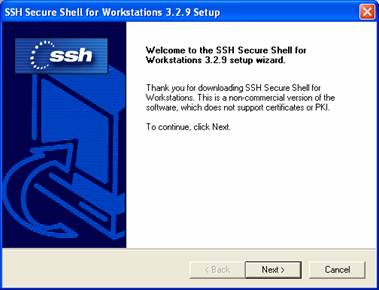
I.2. Read the Welcome screen, and then click Next.
Note: For the rest of the installation process, click the Next button to go to the next step, or click the Back button to return to the previous step.
SSH displays the “Software License Agreement” dialog box.
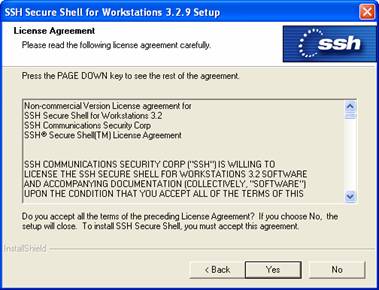
I.3. Read the Software License Agreement.
I.4. If you agree to the terms, click Yes.
SSH displays the “Choose Destination Location” dialog box.
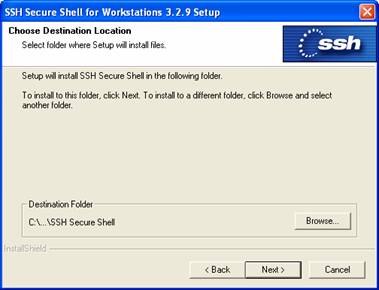
I.5. Specify the Destination Program Folder in which to install SSH.
I.6. Click Next.
SSH displays “Select Program Folder” dialog box
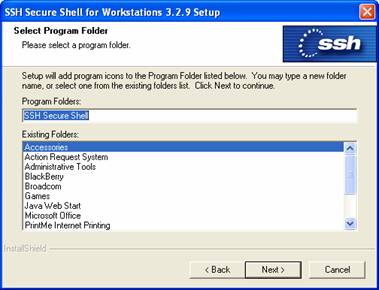
I.7. Specify a folder in which to store the SSH program icon.
I.8. Click Next.
SSH displays the “Choose Components” dialog box.
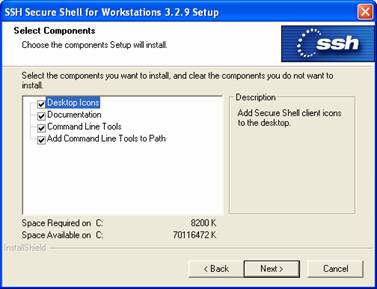
I.9. Choose the components you wish to install.
Note: Leave the Desktop Icons box checked to have the SSH icons created on your desktop.
I.10. Click Next.
SSH displays the “Check Setup Information" dialog box.
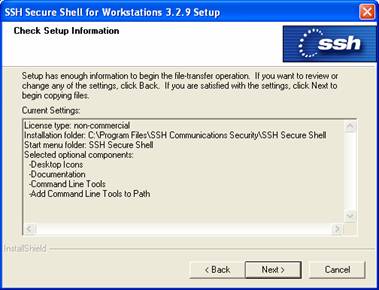
I.11. Click Next.
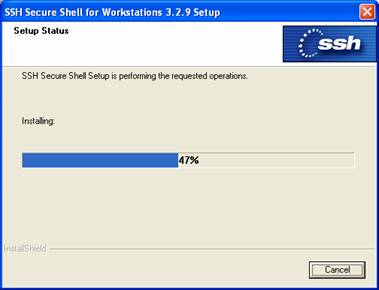
The “Setup Status” dialog box is displayed while the files are being installed.
The SSH “Setup Complete” dialog box is displayed when all files are installed.
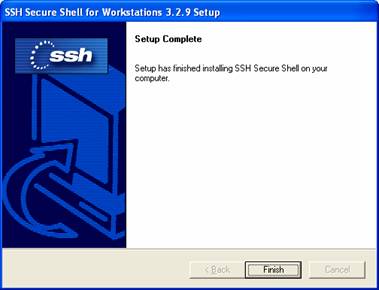
I.12. Click Finish to complete installation.
Note: If you left the Desktop Icons box checked in step I.8, above, SSH installation creates two icons on your desktop:

SSH Secure Shell Client.lnk initiates secure remote login.

SSH Secure File Transfer Client.lnk initiates secure file transfers from your PC.
Remotely Logging on via SSH
R.1 Double-click on the SSH Secure Shell Client icon.

SSH displays the following dialog box.

R.2 Click on Quick Connect to establish a connection.
SSH displays the “Connect to” dialog box.

R.3 In “Host Name” field enter: [server].ucsf.edu.
R.4 In “User Name” field enter your login name.
R.5 In “Port Number field enter: 22.
R.6 In “Authentication Method” field select: “Profile Settings”.
R.7 Click Connect.
The first time you connect (either with the SSH Secure Shell Client or SSH Secure File Transfer Client) the Host Identification window is displayed.
R.8 Click “Yes” to save the host identification key.
SSH Displays the “Enter Password” dialog box.

R.9 Enter your password.
R.10 Click OK to complete the logon process.
When successfully logged on you will see a screen similar to the following:
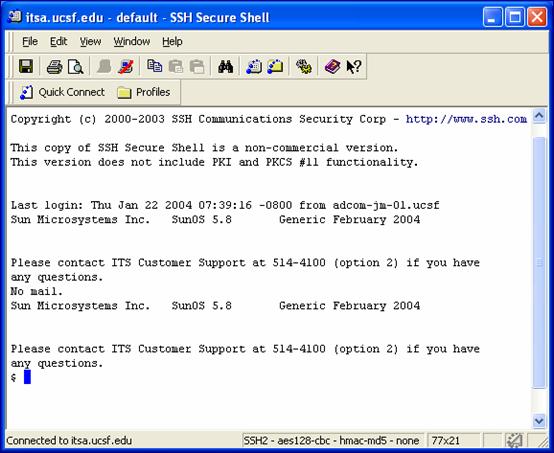
Note: SSH temporarily displays the “Add Profile” dialog box the first time you connect.

R.11 Click on “Profile Name” to highlight it.
R.12 Type the server name for the new profile.
R.13 Press “Enter.”
This profile now is accessible from the Profiles menu each time you wish to login.
To disconnect:
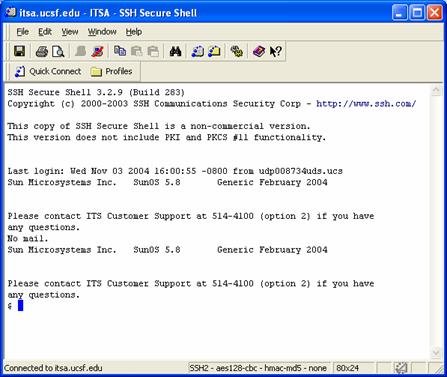
R.14 Click the “Disconnect” icon (circled above).
A “Confirm Disconnect” dialog box appears:

R.15 Select OK to end the connection.
![]()
R.16 Click the “X” in the red box to close the SSH Secure Shell Window.
Transferring Files Using SSH Secure Shell File Transfer
Use the SSH Secure File Transfer Client to transfer files between your PC and another computer.
T.1. Double-click on the SSH Secure File Transfer Client icon.

SSH displays the following dialog box.
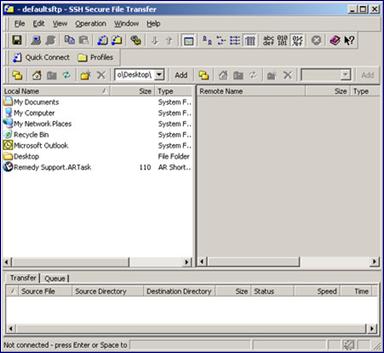
T.2. Click on Quick Connect to establish a connection.
The first time you connect (either with the SSH Secure Shell Client or SSH Secure File Transfer Client) the Host Identification window is displayed:
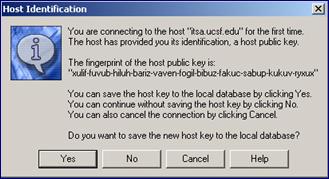
T.3. Click “Yes” to save the host identification key.
SSH displays the “Connect to” dialog box.

T.4. In “Host Name” field enter: [servername].ucsf.edu.
T.5. In “User Name” field enter your login name.
T.6. In “Port Number field enter: 22.
T.7. In “Authentication Method” field select: “Profile Settings”.
T.8. Click Connect.
SSH Displays the “Enter Password” dialog box.

T.9. Enter your password.
T.10. Click OK to complete the logon process.
When successfully logged on you will see a screen similar to the following, with folders and/or files on your PC shown on the left and the files and/or folders on the remote host displayed on the right:
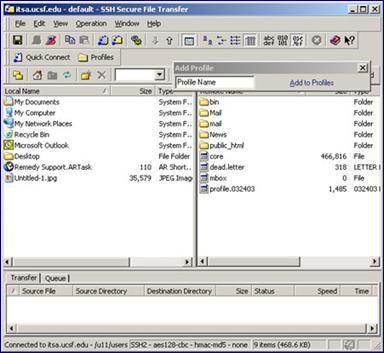
Note: SSH displays the “Add Profile” dialog box the first time you connect to each new server.

T.11. Click on “Profile Name” to highlight it.
T.12. Type the server name for the new profile.
T.13. Press “Enter.”
This profile now is accessible from the Profiles menu each time you wish to
login.
T.14. Navigate to the files on your PC you want to upload.
T.15. Select the file(s) to transfer from your local PC.
T.14. Navigate to the files on your PC you want to upload.
T.15. Select the file(s) to transfer from your local PC.
T.16. Drag the files from your local PC (on the left) and drop them into the
remote host directory (on the right).
Note: To be available on your website, html files need to be stored in your
account’s “public_html” folder.
The “Transfer / Queue” information window at the bottom of the File Transfer
window documents your actions.
To disconnect from the server:

R.17 Click the “Disconnect” icon on the menu bar.
A “Confirm Disconnect” dialog box appears:

R.18 Select OK to end the connection.

R.19 Click the “X” in the red box to close the SSH Secure File Transfer window.
